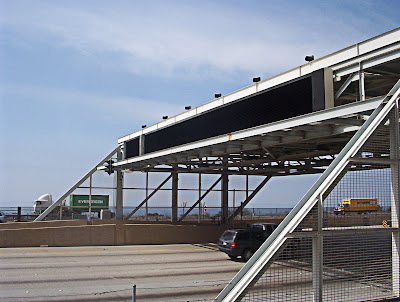
The first picture below was taken while driving down the freeway in Los Angeles. I was drawn to the shape and design of this structure. The angles and the black bridge had an aesthetic appeal, but the image was incomplete and was buried in my "trash" archive.
This second image was created from the above, using only a few tools and several images from other shots I took, using the "Clone Stamp tool" in Photoshop. Listed below are the steps I used.
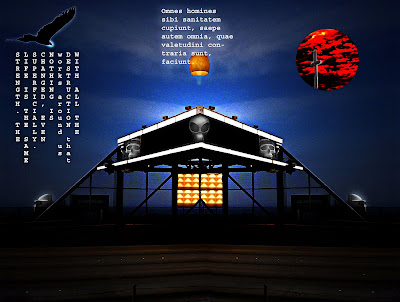
- Create a copy of the original file and rename this file
- Rotate and flip the canvas to the horizontal position
- Using the Move tool drop the copy image on top of the original
- Add a Layer mask
- Use the Gradient tool to align the 2 opposite images to appear as one
- Merge the layers and save
- Open up an image you would like to add a selection to the saved image
- Select the "Clone Stamp tool" and place your cursor on the desired selection holding down the alt tab and single click
- Move back to the original and hold down the mouse button over the area you wish to apply the clone
- Try different brush settings starting off small until you get the right size. For this image I used a Normal and Vivid mode with Opacity set at 100% and a Flow of the same.