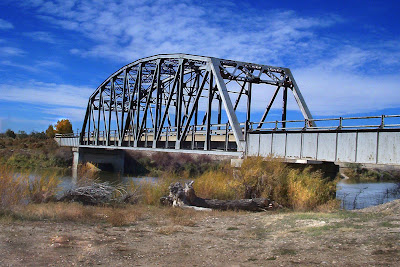
The first image shown was taken of an old bridge crossing the North Platte River in Nebraska. As can be seen, the image has a washed out look and an absence of contrast. There are several other means of improving upon this shot but I wanted to see what could be done using the gradient tool in Photoshop. The results are similar to what could have been accomplished shooting with a polarize lens, however you will lose a stop or two of light and some other adjustment or modification would have to be made, not to mention you may not have access to one.

Here are the steps I took in this new process to enhance the first image. As always, it's a good habit to back up your image prior to any post-production work.
- Create a layer copy using the shortcut Control-J on a PC.
- Add a layer mask located on the pallet box, second icon on the bottom.
- Go to the blend mode and check Multiply. This will darken the entire image. The sky now looks better but the foreground will be darkened as well.
- Go to your toolbox and select the Gradient tool. Start from the bottom of the image and drag the gradient slowly upwards ending at the section you want to lighten. You may want to make several passes before you find the right balance you like.
- I used the Dodge and Burn tool to add additional touches of light and shade to the foreground. Had the subject been a face I probably would have used the Brush tool instead. Just make sure if you brush, that you have the Black over White selected in your toolbox to lighten.
- Go to the top of your toolbar and select Layers and then move down to Flatten Image.
- Save your file and that's it! I did remove a few small unwanted items using the Patch tool, but that's all it took to pickup at least one full stop of light, if not more, for this blue sky.